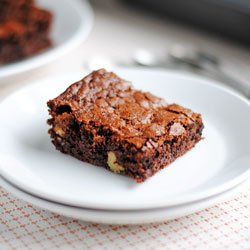
The birthday treats continue! April is a busy month for birthdays around the office, but I’m not complaining about stuffing my face with dessert every other week. I told you about “The List” in my previous post, so it’s always fun to see what…

The birthday treats continue! April is a busy month for birthdays around the office, but I’m not complaining about stuffing my face with dessert every other week. I told you about “The List” in my previous post, so it’s always fun to see what…
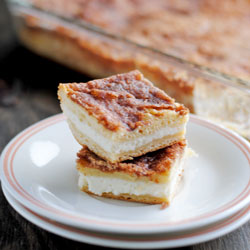
This year with the work birthdays, I created a new way for coworkers to get a birthday treat. Instead of me guessing what they would like, I created “The List.” It’s a list of about 20 or so desserts, with descriptions, they can choose…
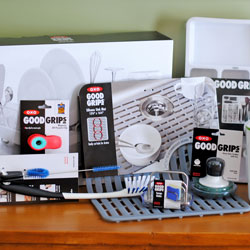
This post is part of the #OXOSpringCleaning campaign. All opinions expressed here are solely my own, as always. Thank you for supporting brands that support So, How’s It Taste. I’ve been a big fan of OXO for a long time, even before I started blogging.…

Quesadillas are one of those foods that I love, but rarely make at home. Why? Because I stink at getting them restaurant crispy. The skillet method never worked for me. They’d get a little brown or my pan wouldn’t be hot enough and they’d…
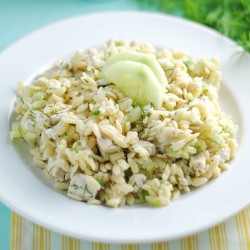
It’s two days from officially being spring. Two days! I’ve never been so excited for winter to be over. I’m starting to crave lighter foods like this amazing Lemony Orzo Salad with Chicken. Not only is it light as in the opposite of a rich,…
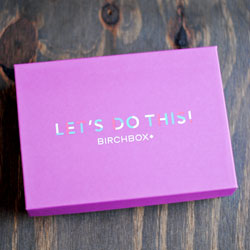
I received my second Birchbox this January and I have to tell you I really look forward to seeing that box in the mail! I love sample sizes, but I really love getting introduced to products I’ve never heard of before. Birchbox is a…

I almost feel like I’m giving away a family secret sharing these Oatmeal Chocolate Chip Cookies. For as long as I can remember, my mom’s been baking these and they are pretty much the best oatmeal cookie out there. The recipe isn’t a secret…
I’ve saved the best for last in my Clean Slate series. However, I’d never argue that dessert wasn’t always the best anyway. Have you seen that movie Simply Irresistible with Sarah Michelle Gellar and Sean Patrick Flanery? Super cute movie with a food theme,…

Oh if there’s ever been the perfect time for this soup. I’ve been stuck in my house since last Sunday thanks to an unreal ice storm plus snow in Nashville. I can finally see parts of my driveway peeking through the ice as it…

In my previous post, I mentioned how I’m cooking from the Clean Slate cookbook and seeing if I actually enjoy clean eating. Before, I assumed clean eating meant bland eating, and I’ve learned that’s absolutely not the case! For breakfast I’ve tried Barley with…

My mindset about food is very familiar this time of year. I’m always trying to clean up my eating from the holiday splurge and it can go well into spring. When the folks at Martha Stewart approached me about reviewing Clean Slate, I jumped…

Lately I’ve been on this naan kick where I want to eat it constantly. It’s so soft and pillowy and buttery. If you leave me alone with naan and hummus, it will be gone in two seconds flat. I’ve made a meal out of…