I knew I had to make Mexican Corn Cakes the second I saw them. It’s just so weird! Savory pancakes? I’m a big fan of anything full of refried beans, salsa, and cheese. Plus any food that gives me an excuse to eat sour…

I knew I had to make Mexican Corn Cakes the second I saw them. It’s just so weird! Savory pancakes? I’m a big fan of anything full of refried beans, salsa, and cheese. Plus any food that gives me an excuse to eat sour…

You may have noticed from my posts lately that I’m working on shedding a few pounds. It’s that time of year when the fear of being in a bathing suit in a few months gets real. We’ve had a few days here and there…
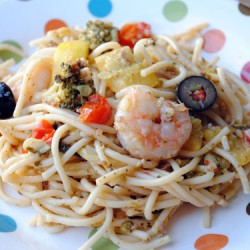
I know it sounds weird to pick a recipe for dinner and not have high expectations. Shouldn’t every recipe attempt to be spectacular? I picked this Italian Shrimp Stir-Fry because I was curious about the Italian twist on stir-fry, but it didn’t seem to…
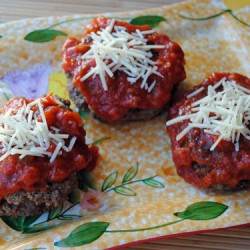
How cute are these?! Yes, I’m referring to food as cute…wouldn’t be the first time. Personal Pizza-Stuffed Meat Loaves are so easy to prepare and the individual servings are perfect to pack for leftovers. So much flavor in one little loaf and inside is…

Soup’s on! I’ve been eating Corn & Shrimp Chowder pretty much everyday since I first made it. It’s absolutely divine. Creamy, bacony, savory, and full of yummy chunks of potato, corn, and shrimp. The serving size for this chowder is a bit on the…
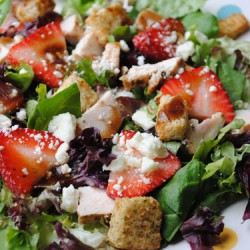
I created this salad on accident. I intended to make the balsamic chicken and top it with feta and tomatoes and have that be my main dish, but somehow ended up slicing the chicken and making Balsamic Chicken, Feta, & Strawberry Salad instead. I…

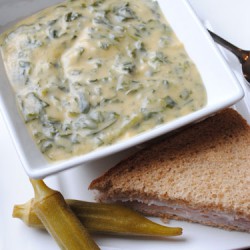
I’ve been craving a lot of soup lately. I don’t know if it’s the weather around here (cold and rainy on some days) or just that time of year, but I want to eat soup all the time. While I have a weak spot…
I can’t believe after 2 1/2 years of blogging, I don’t have a cheesecake recipe. Well, I do, but if you read that post, you’ll see I didn’t love it and it’s not really cheesecake. I’m happy that I finally have a winner in…

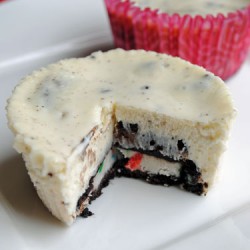
I don’t know what it is lately, but I always seem to have Oreos in the house. While they’re pretty tasty on their own, I like to make desserts out of them. So when I have a bunch in my pantry, I start thinking…
I bookmarked this recipe not too long ago and finally put it on my grocery list. I hesitated buying the ingredients at the grocery store because I thought they were too simple and this soup wouldn’t have enough flavor to taste good. But standing…
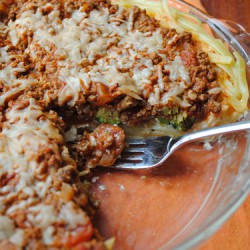
This Italian Fettuccine Pie is quite interesting. Cheese, tomatoes, beef, and a crust made out of fettuccine and mozzarella. Know what else? A slice is only 350 calories. Usually when I’m on the prowl for new recipes that are figure-friendly, pasta and cheese and…
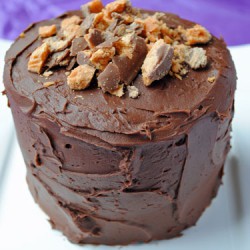
It looks so cute right? I made myself a little Happy Birthday cake! Yep, today’s my birthday! Now don’t go feeling sorry for me that I made my own cake. I was having fun with the Wilton Tasty Fill Mini Cake Pans and thought…